Group classes , private classes and corporate classes .
Beeda Christina Gautier.
certifications by:-
1. Ananda Marga Yoga
2. Malaysian Association of Yoga Instructors
beedagautier@gmail.com
016-8326811
(available on whatsapp)

Wednesday, February 23, 2011

Most Popular Yoga Asana - Savasana


(shah-VAHS-anna)
sava = corpse
Savasana is always practiced at the end of a Yoga class to allow the body to go into Total Relaxation. My students always look forward to this pose and so do I ! Usually the duration is 10% of the total asana time spent in the class.
Savasana can also be done at anytime to release stress or when you feel very tired.


Step by Step

In Savasana it's essential that the body be placed in a neutral position. Sit on the floor with your knees bent, feet on the floor, and lean back onto your forearms. Lift your pelvis slightly off the floor and, with your hands, push the back of the pelvis toward the tailbone, then return the pelvis to the floor. Inhale and slowly extend the right leg, then the left, pushing through the heels. Release both legs, softening the groins, and see that the legs are angled evenly relative to the mid-line of the torso, and that the feet turn out equally. Narrow the front pelvis and soften (but don't flatten) the lower back.

With your hands lift the base of the skull away from the back of the neck and release the back of the neck down toward the tailbone. If you have any difficulty doing this, support the back of the head and neck on a folded blanket. Broaden the base of the skull too, and lift the crease of the neck diagonally into the center of the head. Make sure your ears are equidistant from your shoulders.

Reach your arms toward the ceiling, perpendicular to the floor. Rock slightly from side to side and broaden the back ribs and the shoulder blades away from the spine. Then release the arms to the floor, angled evenly relative to the mid-line of torso. Turn the arms outward and stretch them away from the space between the shoulder blades. Rest the backs of the hands on the floor as close as you comfortably can to the index finger knuckles. Make sure the shoulder blades are resting evenly on the floor. Imagine the lower tips of the shoulder blades are lifting diagonally into your back toward the top of the sternum. From here, spread the collarbones.

In addition to quieting the physical body in Savasana, it's also necessary to pacify the sense organs. Soften the root of the tongue, the wings of the nose, the channels of the inner ears, and the skin of the forehead, especially around the bridge of the nose between the eyebrows. Let the eyes sink to the back of the head, then turn them downward to gaze at the heart. Release your brain to the back of the head.

Stay in this pose for 5 minutes for every 30 minutes of practice. To exit, first roll gently with an exhalation onto one side, preferably the right. Take 2 or 3 breaths. With another exhalation press your hands against the floor and lift your torso, dragging your head slowly after. The head should always come up last.

Therapeutic Applications
Stress

Benefits
Calms the brain and helps relieve stress and mild depression
Relaxes the body
Reduces headache, fatigue, and insomnia
Helps to lower blood pressure

Contraindications and Cautions
Back injury or discomfort: Do this pose with your knees bent and your feet on the floor, hip-distance apart; either bind the thighs parallel to each other with a strap (taking care not to position the heels too close to the buttocks) or support the bent knees on a bolster.
Pregnancy: Raise your head and chest on a bolster.

Beginner's Tip
Often it's difficult to release the heads of the thigh bones and soften the groins in this pose. This creates tension throughout the body and restricts the breath. Take two 10-pound sand bags and lay one across each top thigh, parallel to the crease of the groin. Then imagine that the heads of the thigh bones are sinking away from the weight, down into the floor.


Modifications and Props
Usually Savasana is performed with the legs turned out. Sometimes though, after a practice session involving lots of outward rotation of the legs (as for standing poses), it feels good to do this pose with the legs turned in. Take a strap and make a small loop. Sit on the floor with your knees slightly bent and slip the loop over your big toes. Lie back and turn your thighs inward, sliding your heels apart. The loop will help maintain the inward turn of the legs.


Partnering
In Savasana, it's especially useful to have a partner check your physical alignment. One of the most difficult parts of the body to align on your own is your head. Have your partner sit at your head and observe its position relative to your shoulders. It's common for students' heads to be tilted or turned to one side or the other. The partner should gently cradle your head in his/her hands and draw the base of the skull away from the back of the neck, lengthening the shorter side of the neck, so that both ears are equidistant from the shoulders. Then your partner can lay your head back down on the floor, making sure that the tip of your nose is pointing directly toward the ceiling.


Preparatory Poses
Savasana should conclude both your asana and your pranayama practices.

Deepen The Pose
To help release the brain and quiet the mind in Savasana, take a block and a 10-pound sand bag. After reclining on the floor, position the block on the floor above your head. The block should sit on one of its sides (the height of the block should be about 5 inches), with one of its ends lightly touching your crown. Then lay the sand bag half on the block and half on your forehead. Scrub the forehead skin down, toward your eyebrows. Then let the brain sink away from this weight.

Tuesday, February 22, 2011

How To Protect Your Knees in Yoga


7 Ways to Protect Your Knees in Yoga

1 Avoid hyperextending. When joints are overly mobile and flex too far back, they're hyperextended. In the knees, hyperextension often occurs in poses in which the legs are straightened, such as Trikonasana (Triangle Pose) and Paschimottanasana (Seated Forward Bend), putting an unhealthy tension on the ligaments. If you're prone to hyperextension, keep a slight bend in the knees during standing poses and keep your weight evenly distributed among the four corners of your feet. In seated forward bends, place a rolled-up sticky mat or towel under the knee of the extended leg or legs.
2 Start with your feet. Proper alignment through the feet is the key to building strength evenly in the ligaments on both sides of the knee; when all the ligaments are equally strong, the kneecap glides effortlessly up and down and the cartilage doesn't get worn down. Separate your toes and press actively through the four corners of your feet in every pose, even inversions. If your feet are out of alignment, your knees are going to suffer.

3 Keep your knees in line. When moving into deep knee bends, such as Virabhadrasana II (Warrior Pose II) and Parsvakonasana (Side Angle Pose), first align your bent knee over your ankle, then draw your kneecap in line with your second toe. Maintain awareness in your back foot, pressing down evenly, while lifting up from the arch of your front foot. "If you let the arch drop, the knee falls inside the big toe, and you're set up to suffer a number of different kinds of overuse and acute knee injuries," says Angela Smith, a professor of orthopedic surgery.

4 Tune in to subtle signals. "Oftentimes, the knees don't give immediate feedback," explains Iyengar teacher Joni Yecalsik. "Only later do you realize you've gone too far. When it comes to the knees, the sensation that would normally proceed the red flag is the red flag." If you feel achiness when you come out of a bent-knee pose, you may have worked too hard.

5 Build strength by balancing. Balancing poses, especially those that require moving through a bent standing leg, such as Garudasana (Eagle Pose), are especially beneficial. "Very dynamic balancing protects the knee against future injury by training the functional alignment, not just working the muscle," Smith says.

6 Be prop-friendly. When it comes to seated asanas, nothing makes a tight knee happier than a bounty of props. In Virasana (Hero Pose), try raising your seat with blankets or a block. Anytime the knees are deeply bent, such as in Balasana (Child's Pose) or Marichyasana III (Pose Dedicated to the Sage Marichi III), pressure can be relieved by placing a rolled-up washcloth as far into the knee pit as possible before bending the joint.

7 Warm up with hip openers. "If your big joints aren't open, your small joints will always take the stress," yoga instructor Sandy Blaine says. "Many people hurt their knees doing Lotus when their hips aren't ready." She recommends warming up with hip stretches like Baddha Konasana (Bound Angle Pose) and Gomukhasana (Cow Face Pose).
—C.G.
.........................

Yoga can be a source of knee pain or the ideal therapy. Here's a primer on keeping the joint healthy on and off the mat.
By Catherine Guthrie

The chorus of pops emanating from Kyle Ray's knee was his first clue that his body wasn't happy in Padmasana (Lotus Pose). It was the end of a relaxing yoga class in Louisville, Kentucky, and the teacher had instructed everyone to assume a seated position for some chanting. Sure, Ray's knees had acted up on occasion, but he'd gotten himself into Lotus before and was confident he could do it again. He slowly nestled his left ankle into the crook of his hip. Then, grabbing his right calf, he used his arm strength to muscle the top leg into position.

"The noise was awful," says Ray, 31. A second later, a quick, sharp pain shot through his knee. He gingerly unfolded his legs. After class, it was all he could do to hobble home and place an ice pack on the swelling joint. It took six months for him to be able to walk without pain. Although his knee pain did subside, Ray still frets about the stability of his knees and generally avoids knee-taxing postures like Virasana (Hero Pose).

There's no doubt that yoga asks much of the knees. Done properly, asana practice can shore them up to prevent injuries and slow the progression of some musculoskeletal diseases, but practiced without mindfulness, it spells disaster for these joints. Clearly, there are just as many people who credit yoga with rehabilitating weak knees as there are determined yogis like Ray, who will themselves into complex poses and pay a big price for overdoing it. But in poses like Supta Virasana (Reclining Hero Pose), in which the knees can feel pushed to the edge, it's sometimes hard to know if you're helping or hurting them. So what's a yoga practitioner who's concerned about protecting the knees to do? Nothing can replace the guidance of an experienced teacher, but certain principles can guide you into a safe, beneficial practice.

Weak in the Knees

The knee marks the meeting place of three bones: the shinbone (tibia), the thighbone (femur), and the kneecap (patella). Two crescent-shaped pads of cartilage, each called a meniscus, sit between the shinbone and the thighbone and act as cushions between the bones and shock absorbers during movement. Two sets of ligaments—the cruciates and the collaterals—strap all three bones in place. The cruciates crisscross below the kneecap; the collaterals run alongside the outside of the kneecap. The leg's substantial muscles help these ligaments keep the bones properly aligned.

Unfortunately, the knee's mechanics are better suited to chasing animals for dinner than to sliding into second base, says Stephen Messier, professor of health and exercise science at Wake Forest University in Winston-Salem, North Carolina. "We weren't designed to do the things we do with our bodies nowadays," he explains. "The knee's engineering isn't the greatest."

And it shows: Every year, nearly 11 million Americans complain to doctors about knee pain. Orthopedic surgeons operate more often on the knees than on any other body part; they performed more than 1.2 million such surgeries in 1996 alone (the latest year for which figures were kept).


Roughly 21 million Americans have osteoarthritis of the knee—a degenerative disease in which the cartilage gradually decays and fails to provide the shock-absorbent padding that cushions the bones. Many older people suffer from this painful arthritic condition; age is considered a risk factor, as are obesity and knee injuries.

For years, experts have touted leg strength as one of the best ways to ward off knee problems, including osteoarthritis. This is because the knee's key muscular supports are the hamstrings—which run from the base of the pelvis down the back of the leg to just below the knee—and the quadriceps, the four muscles on the front of the thigh that (among other things) extend a bent leg. At the first sign of the disease, doctors often instruct their patients to build muscle tone and develop flexibility in the legs so as to delay cartilage deterioration and subdue pain.

But the findings of a study published in the Annals of Internal Medicine in April 2003 indicate that in some cases, building leg strength doesn't slow the disease's progression—in fact, it hastens it. Researchers tested 230 volunteers with osteoarthritis of the knee for quadriceps strength and knee alignment, and then retested them 18 months later. The results surprised the medical community: Many volunteers with strong quads also showed rapid cartilage deterioration. But there was a catch—many of those who had strong quads and experienced a rapid progression of the disease also had misaligned kneecaps, a small but significant impairment that intensifies pressure on the cartilage.

You don't even have to suffer from osteoarthritis for misalignment to cause problems in your knees. In fact, Messier says, "misalignment can cause injury and osteoarthritis over long periods of time, especially if you have stronger muscles that are directing the forces improperly." If the muscular contraction between the two sides of the knee isn't balanced, the knee rotates as it bends, which makes the joint pull toward the stronger muscle. Over time, this wears down one meniscus faster than the other and eventually damages the bone the cartilage protects.

While the study points to the problems created by building uneven leg strength, Messier is concerned that its findings will be misinterpreted. "The last thing we want to do is discourage people from getting stronger," he says. What the study actually highlights is the importance of evenly building the leg muscles to keep the joint properly aligned—a task for which yoga is perfect.

One of the Best Antidotes

Whether you're out to guard against injury and disease or regain strength and flexibility after an injury, yoga can be a superb antidote to knee trouble. "Yoga is fantastic for the knees, especially for people recovering from damaged ligaments," says Michael Salveson, who has worked on dozens of yoga students during his 33-year tenure as a Rolfer in Berkeley, California. "Yoga increases the stabilizing action of the leg's big muscles." When the inner and outer quadriceps are equally strong, he adds, they exert an equal pull on the ligaments, which keeps the kneecap in alignment.

Sandy Blaine is a good example. As a teenager, she enjoyed dance and gymnastics. By her early 20s, she'd dislocated both knees on several occasions. Searching for a low-impact way to stabilize her joints, Blaine tried Iyengar Yoga when she was 26. She was initially surprised by the discipline's difficulty, yet what impressed her more was how remarkably good she felt afterward. Within six months of attending two to three Iyengar classes a week, Blaine found that her knee pain had vanished. Today, at 42, she still sounds as if she can't believe her knees are pain-free, calling the result "an absolute miracle."

"I was looking at a lifetime of being very constrained," says Blaine, who is now an instructor at the Yoga Room in Berkeley and regularly conducts workshops on yoga and knee health. Regaining healthy knees "was an incredible relief," she adds.

To evenly engage the leg muscles, Blaine does Utkatasana (Chair Pose) with her back against a wall. She focuses on lifting her toes and pressing down evenly through all four corners of her feet. Otherwise, the outer quadriceps do all the work and old patterns are reinforced, she explains. Another way Blaine works on equalizing muscle use is by balancing on one foot with her eyes closed. "Without the orientation of the eyes, your feet and ankles have to find a true alignment to come into balance," she says.

Robust ligaments are also essential for healthy knees. Less elastic than muscles and tendons, ligaments can give a little and bounce back to their original shape. But trouble brews when they stretch too far: Like a rubber band that's lost its snap, they lose their shape, leaving the joint loose. Salveson, who is also an instructor at the Rolf Institute in Boulder, Colorado, compares the microtears a ligament sustains in an injury to frays in a rope; when a few strands snap, the rope lengthens. After a torn ligament heals, one side may always be a little longer and, therefore, more susceptible to reinjury. "You can make it stronger," he says, "but you can't make it shorter."

Knee experts are actually divided about whether ligaments can be strengthened. "We know that you can increase muscle and bone strength," says Angela Smith, M.D., a clinical associate professor of orthopedic surgery at the University of Pennsylvania School of Medicine. "Intuitively, we think that the other structures of the knee—ligaments and tendons—get stronger as well."

Blane, for one, is convinced that years of Iyengar Yoga have toned her knee ligaments. "At first, my feet, ankles, and knees were so weak that the standing poses were sheer torture," she says. "My ligaments and muscles were strong on the outer leg and weak on the inner leg, which pulled the knee joint to the side. Yoga helped me strengthen those weak areas. It taught me how not to go with the path of least resistance." Her ligaments used to be so weak that she once dislocated her kneecap tripping on a curb. But since committing herself to a regular yoga practice, she hasn't suffered a knee injury in years.


You also can't overlook the role of the joint's supple cartilage in supporting the knee. Without regular use, the cartilage protecting the knee joint becomes dry and brittle, making it vulnerable to decay. "Cartilage is like a sponge," says William Roberts, M.D., president-elect of the American College of Sports Medicine and associate professor of family medicine at the University of Minnesota. "When you exercise, you squeeze the sponge, which allows it to soak up nutrients."

If you've ever struggled to sit between your heels in Virasana or cross your legs into Padmasana, you've probably felt a twinge in your knee joint. While most yoga instructors agree that sharp pain is a one-way ticket out of any pose, the answer to the bigger question of how much (if any) sensation is OK is less obvious. Roberts recommends stretching muscles, not ligaments. "Tension in the muscle is fine. Sensation directly above the kneecap is not a problem," he says. "But if the tension is on the sides of the knees, I'd back off."

Some yoga teachers, however, consider Robert's warning too conservative. "It's a controversial issue," Blaine admits. "At some point, you're going to have some sensation." She advises her students to breathe through the mild sensation of stretching but to immediately come out of any posture that becomes painful.

Joni Yecalsik, a yoga practitioner since 1970, discovered Iyengar Yoga in 1988 while recovering from a torn meniscus. She now teaches Iyengar classes in Hoboken, New Jersey, and encourages her students to tune in to the subtle differences between a sensation in the joint itself and one in the muscle and to avoid anything that irritates the knee joint. "You should feel an opening sensation in the belly of the muscle," she says, "but you don't want to strain the tendons or ligaments."

A focus on body awareness and allowing slow, deep openings make certain forms of yoga ideal for students recovering from knee injuries. These include Iyengar and Anusara (which focus on attention to detail) and Kripalu and Viniyoga (which focus on gentle compassion and healing). If you're recovering from a knee injury or surgery, you might want to steer clear of practices that involve a lot of athleticism and quick transitions between asanas until your recovery is complete.

Regardless of the style you choose, make sure the teacher is knowledgeable about knees and willing to see you through the recovery process. Try to move toward a tough pose with patience and compassion for yourself and with the attitude that getting into the final pose is only the icing on the cake. Then, when you get there, your knees will be as happy as you are.

Catherine Guthrie is a writer and yoga teacher in Louisville, Kentucky, and a regular contributor to Yoga Journal.

Yoga to Release Tension Headaches


A daily yoga program can help you prevent tension headaches.
By Ellen Serber

When it comes to preventing or curing a headache, there is no substitute for a thorough, daily yoga program. The following sequence offers poses that are helpful for opening the chest and stretching and relaxing the upper back and neck. Include them in your regular practice if you are prone to headaches and see if they help bring some relief and new awareness. Breathe deeply and slowly during all the postures and remember to relax the forehead, eyes, jaw, and tongue. The first part of the program is prevention, practiced when you do not have a headache. The second part, beginning with Supta Baddha Konasana, may be helpful in relieving a headache when it first begins. You will have better results if you start stretching and releasing at the first sign of a headache, before the muscles go into spasm.

Tadasana (Mountain Pose): Discovering alignment and finding the center
Standing upright with awareness is one basic way to discover your own unique posture. It is difficult to correct something until you have found out what is really there. Use the wall to identify your alignment, and then practice standing in the center of the room.

Stand with your back to the wall, with your feet together. If that is uncomfortable, separate the feet three or four inches. Plant the feet firmly, feeling the ground with the soles of the feet. Check the distribution of weight between the right foot and the left. Move front, back, and side-to-side on your feet to find the most balanced stance. Make sure that the arch of each foot is lifted, the toes spread apart. The placement of your feet becomes the foundation of your awareness of your whole body. Give yourself enough time to explore and discover how you are actually standing.

When you are ready to move on, firm and straighten the legs. Bring the tailbone and pubic bone towards each other, but do not suck in the abdominals: Lift them. There should be space between the wall and your lower back; do not flatten the lumbar curve. With your "mind's eye," go into the area below the navel, inside the belly, in front of the sacrum. Locate this "center" point. Extend the side torso up, lift the sternum without sticking out the ribs, and drop the shoulders. Take the tips of the shoulder blades and move them into the torso, opening the chest. Let the back of the head reach up. If the chin is raised, let it drop slightly, without tightening your throat; focus your eyes on the horizon. Make sure that the shoulders and back of the head both touch the wall. Relax any tension in the face and neck. Remember that your "center" resides in the area below the navel and in the belly, not in the neck and head. This exercise may feel very constricted if your head is normally forward of your shoulders. Use the wall to inform you, so that you know the relationship of your head to your shoulders, but try not to create more stress as you adjust your alignment.

On an exhalation, raise the arms up to the ceiling, bringing the elbows back by the ears. Let the arms grow from the shoulder blades. Stretch the little finger side of the hand and connect that stretch all the way down to the little toe and into the ground. Remember to keep the feet grounded, the legs strong, and the center of your pose in the area below the navel. Observe whether the movement of the arms has caused tension in the neck area. As you stretch up with the hands, bring the tips of the shoulder blades more deeply into the torso. Hold for a few breaths and then release on an exhalation.

Parsvottanasana arms: Opening the chest

Move a little away from the wall and roll the shoulders back. Clasp your elbows with your hands behind your back. If you have more flexibility you may join your palms behind your back, with the fingers pointing upward. On the exhalation, roll the upper arms back toward the wall, opening the chest between the sternum and shoulder. As you open, keep the ribs relaxed; make sure they don't jut forward. Remember to stay grounded in your feet and center the movement below the navel. Relax the eyes, jaw, and tongue. Release on the exhalation. Change the arm on top, if you are clasping your elbows, and repeat.

Garudasana arms: Opening between the shoulder blades

This pose is helpful for relieving pain between the shoulder blades. It reminds us to keep that area open in the process of stretching the upper back. Wrap your arms around your torso, right arm under the left arm, hugging yourself. Exhale and bring the hands up, the left elbow resting in the right elbow, with the hands rotated palms towards each other. Breathe and feel the stretch; after a few breaths, raise the elbows up higher, to the level of the shoulder. Remain grounded in the feet, centered in the area below the navel. Relax the eyes, jaw, and tongue. Feel the expansion of the inhalation between the shoulder blades and the release on the exhalation. Lower the arms on the exhalation and repeat with the left arm under the right.

Gomukhasana arms: Stretching the shoulders
This pose opens and facilitates movement in the shoulders, which helps correct the rounded upper back and forward head position. Plant your feet firmly in a parallel position and extend the sides of the torso up, pressing down through the sitting bones. The shoulders drop down, and the head rests on the body's midline. Lift the right arm into the air (with a belt in your hand if you have tight shoulders), stretching from the little finger side. Bend the right elbow and reach down between the shoulder blades. Bring your left arm behind your back and swing the left hand up to meet the right, clasping the hands or taking hold of a belt. Relax the ribs. Lift the right elbow into the air and drop the left elbow down. Make sure that the spine stays extended and is not leaning left or right to compensate for tightness in the shoulders. Release on an exhalation and reverse the arm positions.

Simple Seated Twist: Relieving strain in the back, rotating and stretching the neck
Sit on the chair, feet firmly on the ground, sitting bones pressing down, sides of the torso extended. On the exhalation, reach around and take your right arm to the back of the chair and your left hand to your right knee. Extend the back of your head up and make sure the head is on the midline. Turn on the exhalation, breathing low into the belly, then into the chest. Lastly, turn the head and eyes. Remember to keep the shoulders down, the chest open, and the shoulder blade tips in. Center the movement below the navel and in the belly; relax the eyes, jaw, and tongue.

Setu Bandha (Bridge Pose): Actively opening the chest
Lie down on your back with your knees bent and feet hip-width apart. Roll the shoulders under and reach the hands towards the feet, keeping the little finger side of the hands on the floor. On the exhalation, raise the buttocks, lifting the sternum towards the chin. Elongate the back of the neck without pushing it into the floor; you want the neck to stretch, not flatten. Interlocking the fingers on the ground under the back helps to roll the shoulder blades under and is an interesting variation. Relax the facial muscles and jaw, breathe deeply, and come down on an exhalation. This pose is not appropriate during the second half of pregnancy, or if you have been diagnosed with spondylolysis or spondylolisthesis.

Supta Baddha Konasana: Passively opening the chest, releasing tension from the neck
This pose can be done when you first feel signs of a headache. It opens the chest, and with the head resting, encourages the neck to relax. It is best done with the eyes closed and covered with an eye bag, a wrap, or a blanket. Lie back on a bolster or a narrow stack of three blankets, with your head supported on an additional blanket. The lower edge of the blankets should come directly into contact with the buttocks to support the lower back. The chin should drop down so that there is an elongation of the neck muscles, particularly the ones at the base of the skull. Bring the soles of the feet together and spread the knees apart, supported by an additional blanket roll, or if this is uncomfortable, straighten the legs and support the knees with a blanket roll. Experiment with the height of the support to find the most comfortable position for your body. Breathe deeply and slowly, relaxing the forehead, eyes, jaw, and tongue. To come out of the pose, put the soles of the feet on the ground with the knees bent and roll to the side. Do not do this pose if you have been diagnosed with spondylolysis or spondylolisthesis.

Supported Child's Pose: Resting the upper back and releasing the neck
Sit on a folded blanket with your knees bent and your feet under your buttocks. Separate your knees more than hip-width apart and bring your feet together. Bring your torso forward, resting it on a stair-stepped arrangement of blankets or a bolster, adjusted to a comfortable height. Pull the support into your belly. Drop your chin towards your chest as you rest your head. You may want an additional blanket to support your forehead, but continue to lengthen the neck. Dropping the chin to the chest provides a gentle stretch to the back of the neck, right below the skull. The arms should rest on the floor, palms down, elbows bent, hands near the head.

Supported Forward Bend: Releasing and relaxing the neck
Sit on the floor in front of a chair with your legs crossed, with enough blankets on the seat so your forehead can rest on the blankets without strain, or if this is difficult, sit with the legs straight under the chair. Rest your head on the chair seat or blankets with your arms under your forehead. If your legs are straight, pull the chair over your legs towards your belly. Drop the chin towards the chest to gently stretch the neck muscles. Let the weight of the head fall down onto the chair seat. Breathe deeply and slowly.

Supported Ardha Uttanasana (Half Forward Bend): Stretching the lower back, relaxing the upper back and neck
Stand in front of a table stacked with blankets high enough so that when you bend over and rest your torso on them, you are forming a right angle. Extend the spine and rest the arms straight forward or crossed, whichever is more comfortable. Drop the chin towards the chest and let the neck gently stretch. Breathe deeply and slowly.

At this point, if the headache has improved, do the next two poses. If the pain has continued, go to Viparita Karani, or rest flat on the ground in Savasana with the eyes covered and a blanket under the head.

Adho Mukha Svanasana (Downward Dog): Deeply stretching the back, shoulders, and legs
This position should be done with the head resting on a support and the chin moving towards the chest to elongate the neck. If possible, use the resistance of a belt secured to door handles, or a partner and a belt at the top of the thighs to bring the spine into more release. Begin on hands and knees; as you exhale, turn the toes under and lift the sit bones, straightening the legs and arms. Press your hands into the ground as the base of the spine moves diagonally up. The weight of the head will create a stretch in the neck. Watch that the ribs do not sink down; lift them to create a space between the shoulder blades and to avoid jamming the spine. Come down on an exhalation.

Viparita Karani: Inverting the blood flow and calming the mind
Since this pose increases blood flow to the head, it is excellent in the beginning stage of a headache. But if you are having migraine symptoms, indicating that the blood vessels are dilated, and if the pain increases, skip this pose and rest in savasana. Do not do this pose if you have hiatal hernia, eye pressure, retinal problems, heart problems, or disc problems in the neck, or during menstruation or pregnancy.

Lying on the floor with a blanket or bolster under your lower back, place your legs up against the wall. Remember to drop the chin down, creating length in the neck. Cover your eyes with an eye bag or wrap. Some people find headache relief in this pose when they place a weight, such as a sand bag, on the head, with one end on the forehead and the other draped over the top of the head onto the floor. This additional pressure helps to drop the head further into the ground, releasing the strain in the neck muscles.

Savasana (Corpse Pose): Relaxing completely
Lie on your back on the floor with your eyes covered and a blanket under your neck and head. You may put an additional blanket under your knees. If you are pregnant, lie on the left side, extending the bottom leg and bending the top one, with a blanket under the top knee. Relax completely, breathe deeply, and let go.

The author wishes to thank B.K.S. Iyengar and Geeta Iyengar for their generous teaching and Chris Saudek for bringing their therapeutic sequences to the Iyengar Teacher's Exchange in Estes Park, Colorado. Ellen Serber is a yoga and t'ai chi chu'an teacher in Point Reyes Station, California. Visit her Web site at http://mydailyyoga.com.

Happy Feet with Yoga


Give your feet just a little attention, and your whole body will feel better.
By Melanie Haiken

They hold us up all day long, they get us everywhere we need to go, and they connect our bodies to the earth. Some yoga teachers even call the feet the "roots" of the body.

Yet for all that our feet do for us, we don't do much for them in return. We cram them into tight shoes, pound along on them all day, and generally ignore them unless they're giving us serious trouble. The result is that at some point in their lives 7 of 10 people will suffer from foot problems, many of which are entirely preventable.

Robert Kornfeld, a holistic podiatrist in New York City, says he's seen it all: people hobbling in with knobby, inflamed bunions and hammer toes, the dull throb of tendinitis, the achy soles of plantar fasciitis.

Those aren't just niggling minor ailments; some foot problems can alter the foot's structure and trigger pain elsewhere in the body. "I sing that song to my patients," Kornfeld says: "'The foot bone's connected to the leg bone...'" In fact, experts say one of the most important reasons to treat foot problems early is to prevent them from throwing the knees, hips, back, and shoulders out of whack.

And one of the best ways to take care of your feet is with yoga. "I recommend that all my patients start yoga immediately," Kornfeld says. "When you treat foot problems with yoga, you end up treating back pain, hip pain, all kinds of structural problems. Not only does it stretch out the muscles and lead to a greater range of motion, but it helps heal the root issue of inflammation as well."

In fact, yoga gives feet a healthy workout that they rarely get any other way. "You couldn't ask for a better set of tools to reawaken the feet," says yoga teacher Rodney Yee, of the Piedmont Yoga Studio in Oakland, California. Below, some tips from the experts on how best to use yoga to prevent or treat foot pain.

Throw Your Weight Around

The first place to begin building awareness of your feet is in standing poses such as Tadasana (Mountain Pose). Before you start the pose, think about how you naturally stand, suggests Janice Gates, a specialist in therapeutic yoga and the founding director of the Yoga Garden Studio in San Anselmo, California. Do you tend to put your weight on the inner edge of your foot, which tends to make your legs bow inward, or on the outer edge, which tends to make the knees bow out? (If you can't tell, check the bottoms of your shoes—you can often tell from the way the soles are wearing.)

Notice how your weight falls, and then play with it by rocking forward and back, lifting first your toes, then your heels. If you tend to stand perched a little forward, try shifting your weight back a bit, and vice versa.

Next, try lifting the arch of your foot while pushing down around the edges, creating both a sense of rooting into the earth and lifting energy up from the center, to form the Mula Bandha (Root Lock). "Sometimes I use the image of a jack-in-the-box: collapsing down, then springing up," says Gates. "You're pushing down to lift up." Once you start to do this, you'll find yourself more aware of your feet and distributing your weight better in your everyday life.

Work Those Toes
One great way to limber up stiff, underused feet is to work on the articulation of the toes, which in most of us have lost at least some of their range of motion, says Tias Little, director of YogaSource in Santa Fe, New Mexico. Little considers the feet so important he not only focuses on them in his regular sessions, but has also created a separate class he calls Feet as Foundation. "Think of the way babies spread their toes and crawl by pushing off with them," he says. "We need to regain that." Little guides students through a routine in which they try to move each toe separately from the others and practice picking things up with their toes.

In standing poses, focus on elongating the toes to stretch the sole of your foot. Press down into your heels at the same time you press forward with the base of the big and little toes, grounding forward with the ball of the foot. "Think of it as stretching the sole of the foot like a drum," Little says. This can improve circulation, pumping blood and lymph back toward your heart, and potentially stave off edema and varicose veins.

Be Square

Paying attention to—and correcting—the way your feet connect with the earth can correct foot and ankle problems that have repercussions throughout your body. For example, pronated feet (which roll inward from the ankle down) tend to cause knee problems and back pain.

One way to think about foot stability is to think of your feet as having four corners: the big and little toes, and the outer and inner heels. Some teachers use the image of a car with four tires; others conjure up an X on the bottom of the foot. Use whichever works for you, because distributing your weight evenly across your feet is central to healthy alignment. And that, in turn, may lead to a surprise: By resolving foot problems, you may discover you've resolved your knee, back, hip, and shoulder problems as well. Anusara Yoga instructor Amy Elias Kornfeld—who works with patients of her husband, Robert Kornfeld—suggests looking down to make sure that the second toe, shin, and knee are all aligned as you start a pose.

If you still need proof of the importance of foot positioning, think of what happens when you try to go into Vrksasana (Tree Pose) or Garudasana (Eagle Pose) and your feet aren't positioned right. "You have to use the feet or you fall over," Gates says. "Wherever the instability is, it's going to show up." There's a reason your yoga teacher is always telling you to spread your toes: Creating a stable base is essential when one foot is all you have to stand on.

Stretch for Strength

Any pose that stretches the arch or the sole of the foot improves flexibility and loosens tension. Little suggests a simple exercise to warm up your feet before yoga: Stand on a tennis ball and roll it back and forth under your foot, working the toes, the ball of the foot, the arch, and the heel. Virasana (Hero Pose) stretches the top of the foot and elongates the arch, while kneeling with the toes tucked under is the best way to lengthen the plantar muscles on the sole of the foot, which, when contracted, can become inflamed, leading to plantar fasciitis.

Little also teaches students to go back and forth between Vajrasana (Thunderbolt Pose) and what he calls "broken toe pose." From Vajrasana, lift your hips, curl your toes under and lift your heels, and then lean back so your weight rests on the "necks" (not the pads) of your toes.

Adho Mukha Svanasana (Downward-Facing Dog) is another way to give the feet a good stretch; Gates teaches her students to lift the arches of the feet as high as possible, then extend the heels toward the floor to work the plantar fascia. "At first it feels impossible when you try to lower your heels, but it just takes practice. And it feels so good when you do," she says.

Make these exercises part of your life, and your foot bones (not to mention your leg bones, hip bones, and maybe even your head bone) will be forever grateful.

Melanie Haiken is a freelance writer in San Rafael, California.

Friday, February 18, 2011

Yoga Works !

By Elaine Lipson , writer based in San Diego, California.

Medical science is finally validating what yogis have known for thousands of years.


New yoga devotees often talk in mystical terms about discovering a remarkable sense of well-being and health. "Yoga is opening my energy channels," they'll say, or they'll describe a sense of "being in the body." Practitioners also credit yoga for alleviating back problems, menstrual difficulties, arthritis, or chronic pain they once thought would limit their lives forever. These anecdotes are real and meaningful—but do they translate into quantifiable health improvements or the kind of credible scientific research that members of the medical community accept?

Many yoga students, trusting their own experiences, may not know or even care if the medical establishment believes in yoga as a valid therapy for specific diseases or conditions or has researched and quantified yoga's benefits. But there are practical reasons for encouraging scientific research into yoga's benefits. Insurance companies, just beginning to honor yoga and other alternative therapies as legitimate healing practices, are more likely to embrace yoga and reimburse ailing students for its costs if research documents its effectiveness.

Still, it may take some time to develop a significant body of research, especially in this country. "There's a lot of research being done, but not in the United States," says Emmanuel Brandeis, M.D., the founder of Yoga Nemo in West Hollywood, California, and a board-certified gynecologist. "The research is mostly being done in India, and the studies are being published in noted journals with a lot of credibility." Brandeis believes that it comes down to money in the United States; funding for research tends to go into ventures more likely to result in big profits. "Compared to a drug which can be prescribed and sold worldwide, yoga just doesn't make money," Brandeis says. He's optimistic, though, that as more and more people turn to alternative and complementary medicine, this situation will change; he notes that classes at one yoga center in Los Angeles are now being covered by Blue Cross/Blue Shield. "Insurance companies are recognizing the fact that yoga is a less expensive and more efficient method of rehabilitation," he says.

With the establishment of the Office of Alternative Medicine (OAM) in 1992, and the subsequent establishment of the OAM's National Center for Complementary and Alternative Medicine (NCCAM) in 1998, government-funded research about yoga and other mind-body practices is gaining momentum in the united states. As part of the National Institutes of Health, which calls itself one of the world's foremost biomedical research institutions, the NCCAM mandates at least some funding for research in alternative healing therapies. Though these funds don't compare to public and private funding for conventional medicine, the existence of the OAM acknowledges the growing importance of natural and traditional methods of healing, and the roles they may play in today's changing medical climate.

Scientists and medical doctors pursuing yoga-related research are focusing on its ability to help prevent, heal, or alleviate specific conditions, such as heart disease, high blood pressure, carpal tunnel syndrome, asthma, diabetes, and symptoms of menopause, and its benefits as a technique for relieving stress and coping with chronic conditions or disabilities. In fact, the NCCAM itself, identifying yoga as a therapy worth pursuing in the research arena, says that, "During the past 80 years, health professionals in India and the West have begun to investigate the therapeutic potential of yoga. To date, thousands of research studies have been undertaken and have shown that with the practice of yoga a person can, indeed, learn to control such physiologic parameters as blood pressure, heart rate, respiratory function, metabolic rate, skin resistance, brain waves, body temperature, and many other bodily functions." Though it's difficult to find most of these studies, some current, accessible research reports significant results for challenging medical conditions:

Asthma. At the Northern Colorado Allergy Asthma Clinic in Fort Collins, a controlled clinical study of university students (19 to 52 years old) with asthma concluded that yoga techniques seem beneficial as an adjunct to the medical management of asthma, according to the 1998 published abstract. Using a set of asanas, pranayama, and meditation, the yoga group practiced three times a week for 16 weeks. Though pulmonary functions did not show a significant variance between yoga and control groups, "analysis of the data showed that the subjects in the yoga group reported a significant degree of relaxation, positive attitude, and better yoga exercise tolerance. There was also a tendency toward lesser usage of beta adrenergic inhalers."

Cardiovascular Risk Factors. A three-month residential study treating patients with yoga, meditation, and a vegetarian diet at Hanover Medical University in Germany found a substantial reduction in risk factors for heart disease (including blood pressure and cholesterol) in participants, according to an abstract published in Acta physiologica Scandinavica Supplementum in 1997.

Carpal Tunnel Syndrome. A randomized, single-blind, controlled clinical trial at the University of Pennsylvania School of Medicine in Philadelphia concluded, "In this preliminary study, a yoga-based regimen was more effective than wrist splinting or no treatment in relieving some symptoms and signs of carpal tunnel syndrome." The study, published in the Journal of the American Medical Association in 1998, also noted that "Subjects in the yoga groups had significant improvement in grip strength and pain reduction, but changes in grip strength and pain were not significant for control subjects."

Arthritis. Also at the University of Pennsylvania School of Medicine, a yoga-treated group with osteoarthritis of the hands improved significantly more than the control group in "pain during activity, tenderness, and finger range of motion." The randomized controlled clinical trial, published in the Journal of Rheumatology in 1994, concluded, "This yoga-derived program was effective in providing relief in hand osteoarthritis. Further studies are needed to compare this with other treatments and to examine long-term effects."

Researchers have also evaluated effects of yoga on healthy adults and in athletes and compared the effects of yoga to the effects of other forms of physical exercise. One study conducted at the Government Vemana Yoga Research Institute in Secunderabad, India, focused specifically on athletes practicing pranayama techniques. After two years of observation and testing, according to the report published in the Indian Journal of Medical Research in 1994, "the results...showed that the subjects who practiced pranayama could achieve higher work rates with reduced oxygen consumption...and without increase in blood lactate levels." According to Mary Pullig Schatz, M.D., author of Back Care Basics: A Doctor's Gentle Yoga Program for Back and Neck Pain Relief (Rodmell, 1995), the study results indicate that in the pranayama subjects, the body is using oxygen "more efficiently (aerobically) rather than shifting to less-efficient anaerobic (lactate-producing) metabolism."

Another clinical trial by the Yoga Research Institute in Hyderabad, India, followed the effects of intensive yoga training on physiological changes in six healthy adult females. Though the study group was small, the intensive yoga training resulted in participants' ability to exercise more comfortably, with a significantly lower heart rate, and with increased breathing efficiency, according to an abstract published in the Journal of Alternative and Complementary Medicine in 1997.

Many patients with chronic diseases that seem to elude a strict physiological diagnosis and tread the mind-body frontier also respond well to yoga. Patrick Randolph, Ph.D., director of psychological services at the Pain Center of the Texas Tech University Health Sciences Center, has studied the effects of yoga on fibromyalgia syndrome (FS), an often debilitating chronic pain condition affecting up to 6 million Americans with a wide spectrum of symptoms. According to Randolph, yoga offers FS patients a twofold benefit: The asanas help increase circulation to the limbs while the resultant relaxation addresses anxiety. "What many people report from doing yoga is that rather than being an exercise that takes energy away, it actually energizes," Randolph says.

Yoga also alleviates the extraneous mind chatter that can turn chronic pain into misery through relentless anxiety about the condition. "Patients are left with the physical sensation of pain rather than the unnecessary emotional worries that tend to get wrapped around it," Randolph adds. "And that's the real gift yoga offers FS patients. It encourages living within the limits imposed by the body. When we yoke the body and the mind together, we train ourselves to find where we truly are and to stay within that boundary."

Dr. Brandeis of yoga Nemo echoes this prescription of yoga as an aid for patients coping with the anxiety of illness. While Brandeis cites yoga's ability to have an impact in concrete ways, by lowering blood pressure, improving circulation, lessening the need for insulin in diabetics, and improving pulmonary function in children with asthma, he also considers yoga an invaluable restorative and anxiety-reducing practice for some of the special groups he treats: menopausal women, patients with HIV/AIDS, cancer survivors, deaf children, and at-risk teenagers. He hopes in particular to see research about yoga for the ongoing treatment of those living with HIV. "If we can take the anxiety ingredient out," Brandeis says, "we can help the patients cope with illness and also get better physically."

Relieving stress and anxiety is, of course, hard to quantify except by noting physiological changes, which presents a challenge to researchers. And yoga's most ephemeral benefits, such as the opening of energy channels, are even more difficult to define and evaluate in a research setting. Dr. Brandeis believes it will take more scientists with a much greater experiential knowledge of yoga to begin measuring what might be classified as energetic changes. "Probably in the future [research will] try to translate energetic effects into concrete medicine, but right now there aren't enough practitioners with enough knowledge to generate that kind of interest," he says. James S. Gordon, M.D., director of the Center for Mind-Body Medicine in Washington, D.C., also sees energetic changes in yoga practitioners. "Stress relief is certainly part of it, but there's much more to it than that," Gordon says. "I don't think that's the whole story." Gordon suspects that yoga asanas activate different parts of the body in ways similar to the stimulation of the body's meridians in Chinese acupuncture.

Whether yoga is studied as a method for preventing or treating disease, as a way of coping with difficult-to-treat or chronic illnesses, or as a way of altering the energy state of the body, it's important to remember that yoga is a way of living and not an isolated technique, say the experts. "While many doctors and patients demand proof that yoga really can help certain medical conditions, they risk overlooking yoga's far-reaching benefits," says Elliott S. Dacher, M.D., author of Whole Healing: A Step-b\y-Step Program to Reclaim Your Power to Heal (Plume, 1997). "Yoga is a way to get to the source of ourselves. The challenge is not to see yoga as a treatment for disease, but as an opportunity to see something deeper in the self. To reconnect with the body is one way of artfully facing the reality of pain in our life and a means for accepting and being with our lives more deeply," he adds. As researchers build a body of studies and trials confirming what yoga practitioners know so well, then, it may still come down to being in and with our bodies in ways too profound to measure.

Insomnia & Yoga


Kick your insomnia for good by creating a simple and restful nighttime routine
By Nora Isaacs, a freelance writer and the author of Women in Overdrive: Find Balance and Overcome Burnout at Any Age. She tries to get eight hours of sleep at her home Nora in Calofornia.

Leslie Bradley remembers lying awake as a child, unable to sleep. "I've been something of an insomniac my entire life," says the 56-year-old owner of Blue Spruce Yoga in Lakewood, Colorado. But after she contracted West Nile virus in 2004, her sleepless nights became intolerable. "I was in really bad shape," Bradley says. "I couldn't sleep at all without taking drugs like Ambien."

After the prescription sleeping pills became less effective, Bradley decided to explore an alternative route, making an appointment to see Ayurvedic doctor John Douillard, director of the LifeSpa School of Ayurveda in Boulder, Colorado. He put Bradley on a regimen of herbs, tea, self-massage, and breathwork. He also helped her understand the best bedtimes for her body type and encouraged her to make changes to her lifestyle, such as eating a bigger lunch, and not teaching evening yoga classes.

Drawing on her yoga background, she began doing Sarvangasana (Shoulderstand), Halasana (Plow Pose), and restorative poses before going to bed. Within three months, Bradley was off the drugs. "All those things combined have basically cured my insomnia," she says. "I feel much stronger and more solid, more vibrant."

Insomnia—the inability to get to sleep or to sleep soundly—can be either temporary or chronic, lasting a few days to weeks. It affects a whopping 54 percent of adults in the United States at one time or another, and insomnia that lasts more than six weeks may affect from 10 to 15 percent of adults at some point during their lives. To get a decent night's sleep, many Americans are turning to pills. Last year in the United States, about 42 million sleeping pill prescriptions were filled, an increase of 60 percent since the year 2000. But as Bradley discovered, drugs aren't always effective, some have negative side effects, and worst of all, as soon as you stop taking them, the insomnia often returns.

"Sleeping pills are not always a cure; they treat the symptom but not the underlying problem," explains Sat Bir khalsa, a Kundalini Yoga teacher who's also an assistant professor at Harvard Medical School and a neuroscientist at the Division of Sleep Medicine of Brigham and Women's Hospital in Boston. Beneath the symptoms of insomnia are the anxiety, fatigue, and stress that our increasingly fast-paced world seems to be creating. These days, who hasn't worked long hours without taking a break, binged on too much caffeine, or left the cell phone on 24-7?

You may feel that you've adapted to the intense rhythm that modern life requires, but if you're experiencing sleepless nights, your nervous system is probably rebelling. It may be stuck in a state known as arousal, where your sympathetic nervous system is triggered. In this state your mind will race or your palms might sweat. Your body will secrete more stress hormones, and your temperature and metabolic rates will rise, as will your heart rate. "There is very good evidence that people with chronic insomnia have elevated levels of arousal in general," Khalsa says. "And some insomniacs have higher levels right before they go to sleep." But Khalsa, who is studying how a form of Kundalini Yoga breathing called Shabad Kriya helps people with insomnia, offers good news: "Treating the arousal should treat the insomnia." By creating a routine of soothing rituals, you can bring your nervous system back into balance and transform your sleep patterns for good.

Rituals for Relaxing

Whether it's yoga to reduce muscle tension, breathing to slow the heart rate, or an herbal massage to calm a racing mind, a simple routine can be the most effective and safest road to a better night's sleep. There is growing evidence that small behavioral changes can make a big difference in getting some good shuteye. A 2006 study published in the Journal of the American Medical Association showed that participants who made modifications like reducing stimuli in the bedroom and learning relaxation techniques improved their sleep more than those who took drugs.

To find out which rituals will work best for you, it helps to understand insomnia from an Ayurvedic perspective. Yoga's sister science and India's oldest known system of medicine, Ayurveda is based on the idea that the life force that exists in all of us manifests as three different energies, or doshas, known as vata, pitta, and kapha. Though everyone has some of each dosha, most people tend to have an abundance of one or two.

Vata, ruled by air and ether, governs movement in the body. Pitta, ruled by fire, governs digestion and the metabolism. And kapha, ruled by earth and water, governs your physical structure and fluid balance. Ayurveda categorizes insomnia as a vata imbalance, because vata is controlled by air—and air controls the nervous system. Calming yoga and Ayurvedic rituals reduce vata in the body.

Know Your Timing

The first step to feeling well rested is to institute a regular bedtime. Maintaining consistency will help keep your circadian rhythms—the biological changes that happen every 24 hours—steady. Eventually, your body will naturally understand and crave sleep during these hours.

How do you find that magic time? Ayurveda offers helpful guidelines. Douillard says that each dosha corresponds to a time of day: Vata time is between 2 and 6, both in the early hours of the morning and in the afternoon; pitta time is between 10 and 2, both midday and late at night; and kapha time is between 6 and 10 in the morning and evening. Ideally, you should start your bedtime rituals during the slow kapha hours of 6 to 10 in the evening and head for bed before 10 p.m., which is when the fiery pitta time begins.

Tuck in Early

Although eight hours has long been considered the ideal length for a night's sleep, Douillard says that it's not just the number of hours you sleep that matters, but the time of day you go to sleep as well. He insists that our bodies naturally want to arise around 5 a.m., since humans started their day around daybreak before the advent of modern technology. So, if you go to bed at midnight and wake up at 8 a.m. (a lazy kapha hour) you'll probably feel groggy even though you've had the recommended eight hours of sleep. But if you hit the pillow before 10 p.m. and arise before 6 a.m. (during lively vata time), you'll likely feel refreshed and ready to go.

Create a Wind-Down Period

The next step is to create some space between your busy day and sleep time. "You can't just work until 9 at night, and then stick your head on the pillow and fall asleep," Khalsa says. So turn off the television, computer, and radio. Cut down on or eliminate evening classes and exercise that leaves you feeling amped up. When you come home, honor this transition by playing relaxing music, lighting candles, or putting on your favorite pajamas. Think of the yoga precept of pratyahara: Withdraw your senses in order to turn inward.

If your schedule allows you to practice yoga only in the evening and you enjoy a vigorous practice, be sure to end your session with a sequence of slow, passive poses. (Go to yogajournal.com and type "Yin Yoga" or "restorative yoga" in the search box for sequence ideas.)

Nosh and Nibble

The diet mantra "Don't eat before bed" isn't always the best advice. Some folks benefit from nighttime noshing. "When you sleep, you are repairing your tissues," says Aadil Palkhivala, a certified Ayurvedic practitioner and the founder-director of Yoga Centers in Bellevue, Washington. "The body needs nutrition when it's going into a state of healing." Depending on your constitution, bedtime snacks might include spelt toast and butter, organic milk, or lentil dahl. And of course, during the day, it's important to eat healthful fruits, vegetables, nuts, seeds, and grains to promote rest at night. "Sleep is a yin process, but when food has chemicals in it, it becomes yang and the mind goes into a vata state," Palkhivala says. Douillard recommends eating a vata-balancing diet no matter what your type. This includes foods such as cooked apples, Brussels sprouts, tofu, millet, oats, walnuts, and squash. Also, use common sense: If you want to sleep well, don't drink alcohol or caffeine after 5 p.m.

Strike a Pose

After you wind down from your day, notice how you feel before doing an evening yoga routine. Are you wired or tired? "These need to be treated differently," Palkhivala says. If you are amped up, he recommends 10 minutes of poses like twists, standing poses, and active forward bends to burn off excess energy. If you are tired, do some restorative poses or breathing until you feel more refreshed and relaxed—and then hit the sack. Though it seems contradictory, it's common to be too tired to sleep. "Everyone thinks that when you can't sleep, you have too much energy, but usually people have too little energy: They are too exhausted to get to sleep," Douillard explains. Restorative poses can help.

Massage Away Tension

A soothing massage releases muscular tension and helps the transition to bed. Try rubbing your head, neck, face, and arms with warm, unfiltered organic sesame oil. "This puts a shield around the body and also makes you feel nurtured," says Palkhivala. You can also include someone in your ritual by asking them for a yawn-inducing rubdown: The spine from the neck downward should be stroked for about five minutes with a gentle touch.

Breathe for Ease

Breathwork is another excellent addition to your nightly sleep routine. "Every time you exhale, it slows your heartbeat and that helps calm you down," says Roger Cole, an Iyengar Yoga teacher and a research scientist specializing in the physiology of sleep. Try two parts exhalation to one part inhalation. For example, start by exhaling through your nose to the count of 6 and then inhale through your nose to the count of 3. Do this for 5 to 30 minutes before bed.

Keep a Journal

When it's time to go to sleep, do you start replaying the day's events or think of what you need to do in the morning? A great evening ritual is putting your thoughts on paper: Write down the contents of your mind to get all of your worries out before your head hits the pillow.

Get Warm

"When you go to bed, you want your skin to be warm," says Cole. If you're feeling a bit cool, drink a warm cup of herbal tea or take a bath based on your body type. And remember to stay toasty when practicing passive yoga poses: Have a blanket, socks, and a sweater nearby.

Guide Your Relaxation

After getting into bed, try a body scan as you lie in Savasana (Corpse Pose): Progressively tense and then relax each part of your body. If you have trouble doing this on your own, get an audio CD of meditations, guided imagery, or Yoga Nidra (yogic sleep), to help. "This is good for people who have mental chatter," says Cole. "It takes their mind in a different direction."

Once you've chosen your specific nighttime ritual, repeat it every night to cue your body that it's time for sleep. Khalsa says that after a few weeks of practice, your sleep will improve. "These things don't work instantly, but over time you normalize arousal and sleep starts to get better." And as opposed to suffering from side effects such as headaches, dizziness, daytime drowsiness, and long-term dependence on drugs, you'll feel better overall, instead of worse, with your nighttime routine. "It improves individuals on a holistic level, and other problems that they might have had also might start to dissipate," says Khalsa. Now that sounds like a side effect we can all live with.

5 Ways to Get More Out of Every Pose

By Erica Rodefer, a writer and yoga enthusiast in Charleston, SC. Visit her blog, Spoiledyogi.com

In a perfect world we'd all have two hours every morning to unroll our yoga mats and do our asana practice (followed by another half hour of seated meditation). In the real world, however, we have jobs, families, pets, school, and other obligations that make two hours a day seem like an impossible dream for many of us.
Here are a few ways to get more out of every pose on those occasions when I only have a few minutes to squeeze in an asana practice.

1. Hold it. I'm a vinyasa kind of girl, so when my teachers tell me to hold a pose, I often think obscenities and glare at them when they turn their backs to me. I may not like it, but I know it's good for me. So when I only have a few minutes to squeeze in a quick practice, I hold standing poses. When you hold a pose for long enough for it to feel a bit uncomfortable, you're building muscle strength. But you're also building strength of mind by showing yourself that you're stronger than you think you are, which can be an invaluable gift! Resist the urge to pull at your top, brush the hair out of your face, or take sip of water--fidgeting takes your body and mind out of the pose.

2. Breathe into the area of sensation. Breathing is a huge part of every yoga asana. With every inhale imagine that you're creating spaciousness in your body, and go just a little deeper with every exhale.

3. Pay attention. When you let your mind wander during a yoga pose, you're putting yourself at risk for injuries. You also start to lose the quality of the pose and compromise its ability to work deeply in your body.

4. Relax. Scan your body. Are you holding tension anywhere in your body that's not necessary? Your jaw? Your eyes? Your tongue? Your shoulders? Try to relax anything that doesn't have to be tense in order to support you.

5. Change it up. If you practice how you've always practiced, you'll get the same results you've always gotten. That's not always a bad thing... But if you want to see real transformation happen, making little adjustments to the way you practice will make a huge difference. Little changes like lengthening your tailbone toward the floor, lifting your chest toward the sky, or firming your leg muscles and lifting your kneecaps can work a whole new set of muscles and help you get closer to a more challenging variation. Ask for your teachers help if you're not sure what little adjustment you should work on.

Wednesday, February 9, 2011

Sciatica - All you need to know


By Mayo Clinic staff
1.Definition
Sciatica refers to pain that radiates along the path of the sciatic nerve and its branches — from your back down your buttock and leg. The sciatic nerve is the longest nerve in your body. It runs from your spinal cord to your buttock and hip area and down the back of each leg.

Sciatica is a symptom, not a disorder. The radiating pain of sciatica signals another problem involving the nerve, such as a herniated disk. Depending on the cause, the pain of acute sciatica — which may be quite uncomfortable — usually goes away on its own within a couple of months.

In the meantime, self-care measures may help you ease sciatica. Sometimes, your doctor will suggest other treatment.

2.Symptoms
Pain that radiates from your lower (lumbar) spine to your buttock and down the back of your leg is the hallmark of sciatica. You may feel the discomfort almost anywhere along the nerve pathway, but it's especially likely to follow a path from your low back to your buttock and the back of your thigh and calf.

The pain can vary widely, from a mild ache to a sharp, burning sensation or excruciating discomfort. Sometimes it may feel like a jolt or electric shock. It may be worse when you cough or sneeze, and prolonged sitting can aggravate symptoms. Usually only one lower extremity is affected.

Sciatica symptoms include:

Pain. It's especially likely to occur along a path from your low back to your buttock and the back of your thigh and calf.
Numbness or muscle weakness along the nerve pathway in your leg or foot. In some cases, you may have pain in one part of your leg and numbness in another.
Tingling or a pins-and-needles feeling, often in your toes or part of your foot.
A loss of bladder or bowel control. This is a sign of cauda equina syndrome, a rare but serious condition that requires emergency care. If you experience either of these symptoms, seek medical help immediately.

3.When to see a doctor
Mild sciatica usually goes away given time and patience. Call your doctor if self-care measures fail to ease your symptoms or if your pain lasts longer than a week, is severe or becomes progressively worse. Get immediate medical care if:

You experience sudden, severe pain in your low back or leg and numbness or muscle weakness in your leg
The pain follows a violent injury, such as a traffic accident
You have trouble controlling your bowels or bladder

4.Causes
Your sciatic nerve branches from your spinal cord through your hips and buttocks and down the back of each leg. This nerve controls many of the muscles in your lower legs and provides feeling to your thighs, legs and feet. Sciatica may develop when a nerve root is compressed in your lower (lumbar) spine — often as a result of a herniated disk in your lower back.

Disks are pads of cartilage that separate the bones (vertebrae) in your spine. Filled with a gel-like substance, they keep your spine flexible and act as shock absorbers to cushion the vertebrae when you move.

If the outer covering of a disk tears (herniates), gel may seep out and press on a nerve root, causing pain in your back, leg or both. If the damaged disk is in the lower part of your back, you may also experience numbness, tingling or weakness in your buttock, leg or foot.

Although a herniated disk is a common cause of sciatic nerve pain, other conditions also can put pressure on your sciatic nerve, including:

Lumbar spinal stenosis. Spinal stenosis is a narrowing of one or more areas in your spine — most often in your upper or lower back. When the narrowing occurs in the lower spine, the lumbar and sacral nerve roots may be affected.
Spondylolisthesis. This condition, often the result of degenerative disk disease, occurs when one vertebra slips slightly forward over another vertebra. The displaced bone may pinch the sciatic nerve where it leaves your spine.
Piriformis syndrome. The piriformis muscle starts at your lower spine and connects to each thighbone (femur). Piriformis syndrome occurs when the muscle becomes tight or goes into spasms, putting pressure on the sciatic nerve. Prolonged sitting, car accidents and falls can contribute to piriformis syndrome.
Spinal tumors. In the spine, tumors can occur inside the spinal cord, within the membranes (meninges) that cover the spinal cord, or in the space between the spinal cord and the vertebrae. As it grows, a tumor compresses the cord itself or the nerve roots.
Trauma. A car accident, fall or blow to your spine can injure the lumbar or sacral nerve roots.
Sciatic nerve tumor or injury. Sometimes, the sciatic nerve itself may be affected by a tumor or injury.
Other causes. In some cases, your doctor may not be able to find a cause for your sciatica. A number of problems can affect your bones, joints and muscles, all of which could potentially result in sciatic pain.

5.Risk factors
Risk factors for sciatica include health problems, lifestyle choices and inherent qualities, such as age or race, that make it more likely you'll develop a particular condition. Major risk factors for sciatica include:

Age. Age-related changes in the spine are a common cause of sciatica. You're likely to have some deterioration in the disks in your back by the time you're 40.
Occupation. A job that requires you to twist your back, carry heavy loads or drive a motor vehicle for long periods makes you more prone to develop sciatica.
Prolonged sitting. People who sit for prolonged periods or have a sedentary lifestyle are more likely to develop sciatica than active people are.
Diabetes. This condition, which affects the way your body uses blood sugar, increases your risk of nerve damage.

6.Complications
Although most people recover fully from sciatica, often without any specific treatment, sciatica can potentially cause permanent nerve damage. Depending on what's causing the nerve to be compressed, other complications may occur, including:

Loss of feeling in the affected leg
Loss of movement in the affected leg
Loss of bowel or bladder function

7.Preparing for your appointment
Make an appointment with your primary care provider if you have symptoms common to sciatica that are severe or that don't improve within a month of self-care measures.

Here's some information to help you prepare for your appointment and what to expect from your doctor.

What you can do

Write down any symptoms you've been having, and for how long.
Make a list of your key medical information, including any other conditions for which you're being treated and the names of any medications, vitamins or supplements you're taking.
Note any recent accidents or injuries that may have damaged your back.
Take a family member or friend along, if possible. Someone who accompanies you may remember something that you missed or forgot.
Write down questions to ask your doctor. Creating your list of questions in advance can help you make the most of your time with your doctor.
For radiating low back pain, some basic questions to ask your doctor include:

What is the most likely cause of my back pain?
Are there any other possible causes?
Do I need any diagnostic tests?
What treatment approach do you recommend?
If you're recommending medications, what are the possible side effects?
For how long will I need to take medication?
Am I a candidate for surgery? Why or why not?
Are there any restrictions that I need to follow?
What self-care measures should I be taking?
Is there anything else I can do to help prevent a recurrence of these symptoms?
In addition to the questions that you've prepared to ask your doctor, don't hesitate to ask other questions that arise during your appointment.

What to expect from your doctor
Your doctor is likely to ask you a number of questions. Being ready to answer them may reserve time to go over any points you want to spend more time on. Your doctor may ask:

What are your symptoms?
When did you first notice these symptoms?
How often do your symptoms occur?
Have you had any unexplained fevers or weight loss?
Have you had any new problems with bowel or bladder control?
Do your symptoms include any numbness or weakness in your legs?
Does anything make your pain better or worse?
How much is your pain limiting your ability to function?
Does your work or recreational activities involve any heavy physical work?
Do you exercise regularly? If yes, with what types of activities?
Do you smoke?
What treatments or self-care measures have you tried so far? Has anything helped?
Are you currently being treated or have you recently been treated for any other medical conditions?
What medications are you currently taking, including prescription and over-the-counter drugs as well as vitamins and supplements?
What you can do in the meantime
While you're waiting for your appointment, you may find some relief by using over-the-counter pain relievers, such as aspirin, ibuprofen (Advil, Motrin, others) or acetaminophen (Tylenol, others). You may also benefit from applying alternating cold and heat to the area that's causing you pain.

8.Tests and diagnosis
To help diagnose sciatica and pinpoint which nerves, if any, are affected, your doctor will use these approaches:

Medical history. Your doctor will ask about your medical history.
Physical exam. Your doctor will perform a thorough physical exam, paying special attention to your spine and legs.
Basic muscle tests. Likely, your doctor will have you undergo some basic tests that check your muscle strength and reflexes. For example, you may be asked to walk on your toes or heels, rise from a squatting position and, while lying on your back, lift your legs one at a time straight in the air. Pain that results from sciatica will usually become worse during these activities.
Imaging tests
If your pain lasts longer than four weeks or is very severe, or you have another serious condition such as cancer, you may have one or more imaging tests to help identity why the sciatic nerve is compressed and to rule out other causes for your symptoms.

These tests include:

Spinal X-ray. Ordinary X-rays can't detect herniated disk problems or nerve damage. A spinal X-ray can help pinpoint the cause of sciatica.
Magnetic resonance imaging (MRI). This is probably the most sensitive test for assessing sciatic nerve pain. Instead of X-rays, MRI uses a powerful magnet and radio waves to produce cross-sectional images of your back. Most MRI machines are large, tube-shaped magnets. During the test, you lie on a movable table inside the MRI machine.
Computerized tomography (CT) scan. This test uses a narrow beam of radiation to produce detailed, cross-sectional images of your body. When CT is used to image the spine, you may have a contrast dye injected into your spinal canal before the X-rays are taken — a procedure called a CT myelogram. The dye then circulates around your spinal cord and spinal nerves, which appear white on the scan.
Treatments and drugs
By Mayo Clinic staff
For most people, sciatica responds well to self-care measures. These may include use of alternating cold packs and hot packs, stretching, exercise, and use of over-the-counter (OTC) medications. Beyond the self-care measures you may have taken, your doctor may recommend the following:

Physical therapy. If you have a herniated disk, physical therapy can play a vital role in your recovery. Once acute pain improves, your doctor or a physical therapist can design a rehabilitation program to help prevent recurrent injuries.

Rehabilitation typically includes exercises to help correct your posture, strengthen the muscles supporting your back and improve your flexibility. Your doctor will have you start physical therapy, exercise or both as early as possible. It's the cornerstone of your treatment program and should become part of your permanent routine at home.

Prescription drugs. In some cases, your doctor may prescribe an anti-inflammatory medication along with a muscle relaxant. Narcotics also may be prescribed for short-term pain relief. Tricyclic antidepressants and anticonvulsant drugs also can help ease chronic pain. They may help by blocking pain messages to the brain or by enhancing the production of endorphins, your body's natural painkillers.
More aggressive treatments
When conservative measures don't alleviate your pain within a few months, one of the following may be an option for sciatica treatment:

Epidural steroid injections. In some cases, your doctor may recommend injection of a corticosteroid medication into the affected area. Corticosteroids suppress inflammation around the irritated nerve, thereby helping to relieve pain.

Their usefulness in treating sciatica remains a matter of debate. Some research has found that corticosteroids can provide short-term symptom relief but that these medications aren't a long-term solution. In addition, corticosteroids can have side effects, so the number of injections you can receive is limited. If your doctor recommends corticosteroids, he or she will determine a safe course of injections for you.

Surgery. This is usually reserved for times when the compressed nerve causes significant weakness, bowel or bladder incontinence or when you have pain that gets progressively worse or doesn't improve with other therapies.

Surgical options include diskectomy and microdiskectomy. In diskectomy, surgeons remove a portion of a herniated disk that's pressing on a nerve. Ideally, most of the disk is left intact to preserve as much of the normal anatomy as possible. Sometimes a surgeon will perform this operation through a small incision while looking through a microscope (microdiskectomy).

Success rates of standard diskectomy and microdiskectomy are about equal, but you may have less pain and recover more quickly with microdiskectomy. Discuss which option might be best for you with your doctor, and carefully weigh the potential benefits of surgery against the risks.

9.Lifestyle and home remedies
For most people, sciatica responds well to self-care measures. You'll heal more quickly if you continue with your usual activities, but avoid what may have triggered the pain in the first place. Although resting for a day or so may provide some relief, prolonged bed rest isn't a good idea. In the long run, inactivity will make your signs and symptoms worse.

In addition to resuming usual activities, try the following measures:

Cold packs. Initially, using cold packs may be able to reduce inflammation and relieve discomfort. Wrap an ice pack or a package of frozen peas in a clean towel and apply to the painful areas for up to 20 minutes at least several times a day.
Hot packs. After two to three days, apply heat to the areas that hurt. Use hot packs, a heat lamp or a heating pad on the lowest setting. If you continue to have pain, try alternating warm and cold packs.
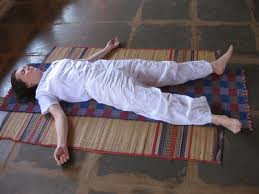
Stretching. Stretching exercises for your low back can help you feel better and may help relieve nerve root compression. Avoid jerking, bouncing or twisting during the stretch and try to hold the stretch at least 30 seconds.
Over-the-counter medications. Pain relievers (analgesics) fall into two categories — those that reduce pain and inflammation and those that treat only pain. Nonsteroidal anti-inflammatory drugs (NSAIDs), such as aspirin and ibuprofen (Advil, Motrin, others), and acetaminophen (Tylenol, others) can both be helpful for sciatica.

Although they can provide real relief, there's a limit to how much pain they can control. What's more, NSAIDs can cause side effects such as nausea, stomach bleeding or ulcers, and acetaminophen can cause liver problems if taken in excess.

If you use these medications, talk to your doctor so that you can be monitored for problems and periodically re-evaluate whether you still need them. Exercise, stretching, massage and other nondrug treatments can often provide the same benefits without side effects.

Regular exercise. It may seem counterintuitive to exercise when you're in pain, but regular exercise is one of the best ways to combat chronic discomfort. Sustained, regular exercise prompts your body to release endorphins — the body's natural painkillers.

Early in the course of sciatica, water exercise or other low-impact exercise, such as stationary bicycling, will help you stay active without worsening your symptoms. As you improve and the pain lessens, a combined program of aerobic activity, strength training and core stability exercises can help limit the effects of age-related back problems.

Ask your doctor to help you design a safe step-up program for exercise. You may benefit from working with a certified personal trainer, fitness specialists or physio therapist

10.Alternative medicine
Many alternative therapies are being studied intensely, and some have proved to help alleviate back pain.

Acupuncture. In acupuncture, the practitioner inserts sterilized stainless steel needles into your skin at specific points associated with the flow of a vital energy called qi (chee). It's believed that these fine needles can loosen blocked qi and restore balance. In most cases, you won't feel the needles — in fact, many people find the treatments extremely relaxing.

Some studies have suggested that acupuncture can help back pain, while others have found no benefit. If you decide you'd like to try acupuncture, choose a licensed practitioner to ensure that he or she has had extensive training.

Chiropractic. Chiropractic treatment is based on the philosophy that restricted movement in the spine may lead to reduced function and pain. Spinal adjustment (manipulation) is one form of therapy chiropractors use to treat restricted spinal mobility. The goal is to restore spinal movement and, as a result, improve function and decrease pain.

Some studies done on spinal manipulation have found it to be as effective and safe as standard treatments, especially for initial pain relief, though the optimal number of treatments is unknown.

Massage. It's difficult to conduct objective clinical trials in massage due to variances in practitioners and in massage types. However, studies that have been conducted suggest that massage may ease low back pain symptoms.
Hypnosis. Hypnosis produces an induced state of deep relaxation in which your mind stays narrowly focused and open to suggestion. During hypnosis, you can receive suggestions designed to decrease your perception of pain and increase your ability to cope with it. No one knows exactly how hypnosis works, but it may alter your brain wave patterns in much the same way as other relaxation techniques.

11.Prevention
It's not always possible to prevent sciatica, and the condition may recur. The following suggestions can play a key role in protecting your back:

Exercise regularly. This is the most important thing you can do for your overall health as well as for your back. Pay special attention to your core muscles — the muscles in your abdomen and lower back that are essential for proper posture and alignment. Ask your doctor to recommend specific activities.
Maintain proper posture when you sit. Choose a seat with good lower back support, arm rests and a swivel base. Consider placing a pillow or rolled towel in the small of your back to maintain its normal curve. Keep your knees and hips level.

When working at a computer, adjust your chair so that your feet are flat on the floor and your arms rest on your desk or the chair's arms, with your elbows bent at a right angle. Take frequent breaks, even if it's just to walk around your office.

Use good body mechanics. Being conscious of how you stand, how you lift heavy objects and even how you sleep can go a long way toward keeping your back healthy. That's because poor posture stresses your back, leading to fatigue and stress on joints and nerves.

If you stand for long periods, rest one foot on a stool or small box from time to time. While you stand, hold reading material at eye level instead of bending forward.

When you lift something heavy, let your lower extremities do the work. Move straight up and down. Keep your back straight and bend only at the knees. Hold the load close to your body. Avoid lifting and twisting simultaneously. Find a lifting partner if the object is heavy or awkward or if you're fatigued.